Six Months of Remote Working

We are well on our way to completing six months of working remotely due to the COVID-19 pandemic and the need for social distancing. All of my team members can do their work from home and are doing an exceptional job, but for many of us, working with faculty and others in person is our juice, our inspiration, our preferred way of interaction.

I’m an introvert at my core, so working from home at first was advantageous. I could get so much work done, catch up on my reading, and felt really good. But lately, it’s starting to get to me. Sure, I go to campus for half-days most days of the week, but it’s just moving from one box to another. And most of the team is still working remotely full time. So I’m alone on campus too! We aren’t open for in person visits so we are still interacting with faculty online.

I feel like the walls are closing in.

So what am I doing to combat this feeling of aloneness? I’m trying to stay off of social media and trying to make real connections. Calling, FaceTiming or Zooming so I see my kids and grandkids faces. I’m taking time to work on my art and read. My husband and I took a kayaking class last Saturday and had a blast.

But I’m going to have to really pay attention to my moods and general mental and emotional well being to stay ahead of the depression. And maybe part of that is just digging in deep to how I’m feeling instead of trying to push past it. Acknowledge that this is really challenging and try to find ways to ameliorate the down times.

AND I can hardly wait for our vacation in one month. That will help so much! Keeping fingers crossed that the second wave doesn’t prevent us from taking that vacation.

ART 132 2D Art & Design

Here are some of the projects I created as part of the course.

  • third color scheme
  • Final Painted with Acrylics
  • slide showing photo, design, and wallpaper
  • pencil drawing of texture

I love stencils and polymer clay!

Layering techniques for polymer clay bring a whole new dimension to polymer jewelry design and this artist has found a way to layer stencils to create a gorgeously fun look for her designs.

Lorraine Vogel posted a free tutorial on how to use stencils to create this look (I love it when artists share!). The post is on StencilGirlTalk‘s site, so you can purchase the products she used right there! Aren’t these Gorgeous!

photo of necklace and earrings

This makes me want to get to my clay table right now!  Hum, a good project for this week-end and for the 2017 PCChallenge (of which I’m 2 weeks behind, yikes!)


Building a Business While Working Full-time

Woman relaxing with cup of tea

I have not been working at a ‘full-time’ job for a little over 7 months now.  It’s been amazing, wonderful, inspiring, and restful.  But still needing to live in reality, I just accepted a full-time position in my profession of faculty development.


In my ‘off’ time, I launched my online polymer jewelry store – ECB Designs – December 1st and actually sold a few items!  purple polymer clay pendant

I’m also pursuing a certificate in Social Media Marketing at Northwestern University through a series of Coursera MOOCs.  So part of my launch is also learning how to reach my target market through social marketing.

One thing I know for sure is that I don’t want to lose my momentum with ECB Designs.  Creating polymer jewelry is one expression of my creative self that I find hugely fulfilling and ultimately a great destresser!

So how am I going to keep moving forward in starting this business while working full-time?  Well I did what we all do and Googled it.  Here’s what I found.

One of the top hits is Ryan Robinson’s 10 Steps to Start a Business While Working a Full-time Job

He has 10 great steps but the first two are the ones I want to focus on because it’s about time.

Step 1: Mental Preparation

  • Accept that this will be tough in many ways
  • Be prepared to make difficult sacrifices

Step 2:

  • List all of the commitments you have and the amounts of time you devote to each
  • Note the one you can afford to lessen you involvement

These are particularly pertinent to my situation because I’m a joiner!  I love to get involved with everything (almost)!   Book clubs, clay clubs, benefit causes, professional organizations, etc.

And I still operate under the perception that there are more that 24 hours in a day

AND (this is a biggie) I like my sleep!  I NEED my sleep!  I’m not good to be around if I don’t get my sleep!

So what to do:

  1. I know it’s going to be hard. For me the creating part of it is natural, but the marketing is the part that I will need to stick to a strict schedule.
  2. I will need to be very selective in the causes and groups I volunteer for.

Here’s the link to Ryan’s Infographic for the other 8 steps.

I will begin my new job in a few weeks. So I’m going to work through these two steps as I acclimate to the new position, new institution, and new town.  So stayed tuned for the next installment of this story and more excellent finds on How to Start a Business While Working Full-time!

Week 3: 2017 PC Challenge

screen shot of shape from bookAs I posted last week, I love Helen Breil‘s shapes eBook, so this week I am trying another of her shapes. This one is Big Twist #5. I think it is one of my favorites.

I just love the movement of this necklace. I needed to make a necklace to go with a black and red outfit so I used Linda Moseley’s controlled marbling technique to get a skinner blend with mostly red.  So here’s my process and the final result.

The first step I took was to take some scrap clay and make the shape to get some practice and to see the result of the shape.work table shot showing cutters, polymer clay discs and the trial version of the shape

Then I used Linda Moseley’s controlled marbling technique to create a skinner blend with more red, less black and a bit of silver. I ended up using three silver parts instead of two. I’m glad I did as I like the end result.

Here is how I stacked the discs and my first blend.

IMG_0735first blend

I blended a bit further than Linda’s recommendation because I wanted more blur between colors. I made sure that the blend was the same on both sides, since both sides are visible with this shape.

skinner blend on back skinner blend on front

I made the first cut. I did not use plastic to bevel the edges because I wanted sharp edges.  Same with the second cut.

first cut with larger cutterIMG_0741

I finished shaping the cut and then made the fold.  Helen includes very detailed pictures in her tutorials, so the result is perfect!the polymer piece is cut, shaped and folded

I would have liked a bit more black on the arms but that’s how we improve our art, correct?  Next time I will use one more black disc and one less red. Maybe a bit more silver, but I’m pretty pleased with the outcome.

I cured it along with a couple of beads I made to add to the necklace.

IMG_0761 (1)
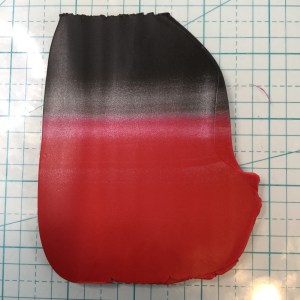
I found out that when you put buna cord in the oven, it shrinks and becomes wider. So one of the cords is wider, but it actually adds to the aesthetic of the piece. I also cut 1/4″ strips of the blend and shaped into matching earrings.  I’m very pleased with the end result.

And with the outfit!

finished necklace on the outfit I made it for

#2017PCChallenge 3/52

ECB Designs – www.elicbrowndesign.com

2017 Week 2 challenge piece

I love working with Helen Breil‘s Shapes pendants.

She has a marvelous eye for design and color and I can only hope to get close to her talent.  This week I made a necklace to go with a new pantsuit for a job interview.  I made a similar one last month that sold quickly.  This time I used a different pattern but the same colors.  It looked ‘marvelous, dawling!’ and boosted my confidence for the interview!

purple polymer clay pendant

purple polymer clay pendant on artist

My plan for Week 3 is to work with another shape. I need to make something to go with a red and black outfit.

I would highly recommend her tutorials. classes and ebooks. She is an exceptional instructor, providing tips and tricks that others skip over. Here is a link to the Shapes:  25 Inspirational Jewellery Designs in Polymer Clay ebook.

[Week 1 Challenge Piece]

#2017PCChallenge

Moving into a New Year

I don’t make resolutions. To me it’s just setting yourself up for failure, so instead I write intentions:

  • I intend to follow Paleo 85-90% of the time.
  • I intend to increase my yoga practice
  • I’m participating in the 2017 Polymer Clay Challenge, hosted by Katie Oskin of KatersAcres.
    • I intend to create a finished polymer jewelry piece each week in 2017
    • I intend to work to improve my work using various techniques, such as mokume gane, texture stamps, shapes, and drawing on polymer.  It’s going to be somewhat of a mishmash, but I intent to work progressively through many of the techniques.
    • Successful pieces will go into my online store – ECB Designs
  • In general, I intend to show more compassion and love, promote peace, understanding and inclusivity, and connect more with those who will engage with my authentic self, both artistically and professionally.

Here we go!

happy face PC challenge


Don’t Fade Away!

Drawing on Polymer Clay

Copyright © 2013 by Ginger Davis Allman The Blue Bottle Tree, all rights reserved.

As a polymer clay artist, have you ever experienced fading or bleeding ink on your polymer designs? I have started including hand-drawn designs on my polymer pieces so I found two articles highlighting the results of different experiments with using ink to draw on polymer clay, including how to seal and finish the pieces.

Rebecca Watkins, @artybecca, in her post Transfer, Paint, Ink on Polymer – http://artybecca.blogspot.com/, shares her results with liquid clay, toner transfers, colored pencils, inks, and paint pens. She seals each added surface technique with a thin coat of liquid polymer clay (LPC), starting with a tonal transfer she created in Illustrator. She adds lines with oil paint pens and upon experience EPD (the dreaded early pen death!), discovered Sharpie ultra-fine oil paint pens. She also used InkJoy by Papermate to shade her designs, but found that a couple of colors bled when she sealed with LPC, so she ended up drawing the lines again on top of the last sealing layer.

artybecca-final-product-fish

A few years back, Ginger Davis Allman experimented with a variety of pens on two different types of polymer clay, Premo and Kato, in Which Pen to Use on Polymer Clay. She added two other variables to the experiment, wiping the ink with a water soaked paper towel and an alcohol soaked paper towel. She documents her results with great photos. Her final recommendations are Sakura Microperm, PITT Artist Markers, and Montana Acrylic Paint Markers, but not Sharpie.

drawing_ink_on_polymer

The thing to remember is that companies change their products all the time. So the new Sharpie oil based paint pens are a different formula than Sharpie Markers or the markers Ginger tested in 2009.  So here are my three recommendations based on these two great posts:

  • Experiment, experiment, experiment! – grab some clay, some pens and paint, and play!
  • Create a prototype – you need to do this anyway to make sure that the size, shape and structure will lay correctly on the body.
  • Fail! – yes, that’s right! Don’t be afraid to mess up. Many great new techniques were actually failures first!

elifbphoto

Eli Collins-Brown of ECB Designs, has been playing with polymer clay since 2009. Intrigued by the colors and endless possibilities of the medium, she focuses on wearable art and unique pieces of jewelry. Wearable art includes polymer, wire wrap and fiber work.  Contact: elicbrowndesign@gmail.com